Have you faced trouble when you use “When a record is created, updated or deleted trigger”? In my case, it took a long time to trigger or sometimes doesn’t trigger at all. It worked for Depreciated Dynamics connector but with the CDS connector, it seems to be an issue.
I switched to using Service Principal for connecting with the PowerAutomate and it greatly solved this issue while I couldn’t find any official documentation which mentions this solution though.
What is Service Principal?
PowerAutomate or any automation tool required privileges to access data. In order to access data, we use connections in PowerAutomate. And usually, with PowerAutomate, it’s more convenient to use a user account to set up a required connection but it comes with its own baggage. With service Principal, you create an application within Azure Active Directory, which is authorized to access resources or resource groups in Azure and the assign security roles to that user.
Why service principal?
- Removes dependency from a user account.
- Provides better security and keep the access limited to the application rather than a use.
- Make it configurable for the minimal permissions required by the flow and ensures the flow actions are not tied to a specific human user.
How to connect to service principal?
When creating a PowerAutomate, you can click on Connect with Service Principal.
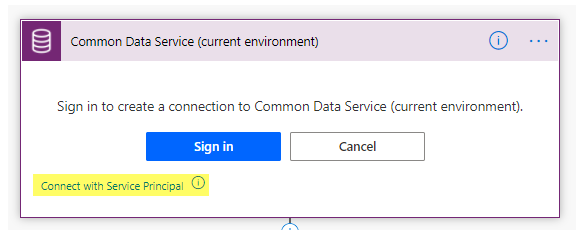
You need to provide Client ID and Client Secret along with Tenant Id to establish a connection. You can check below to see how you can do that.

How to create service principal?
For creating a service principal, you need to register an app in Azure and give the access to that app to access data for user impersonation.
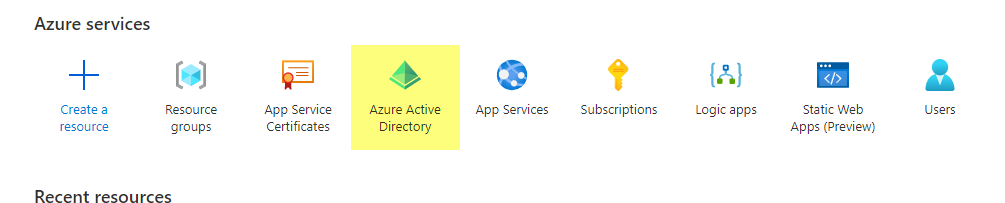
- Go to portal.azure.com
- Search for Azure Active Directory or click from the Azure Services list.
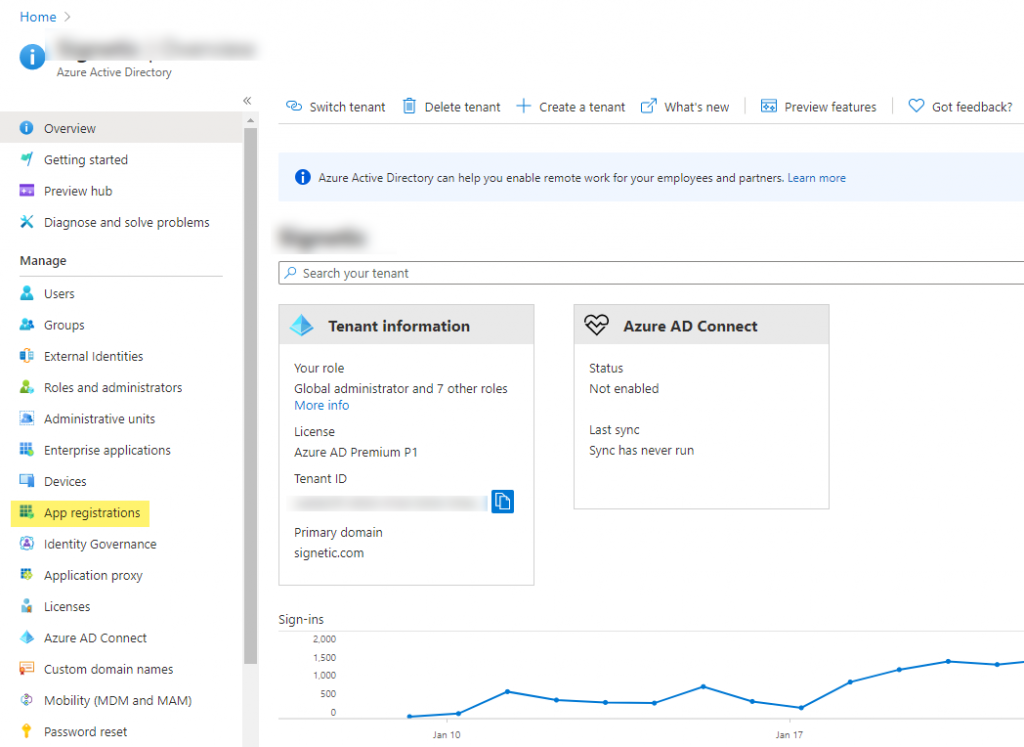
- Go to App registration to register an app.
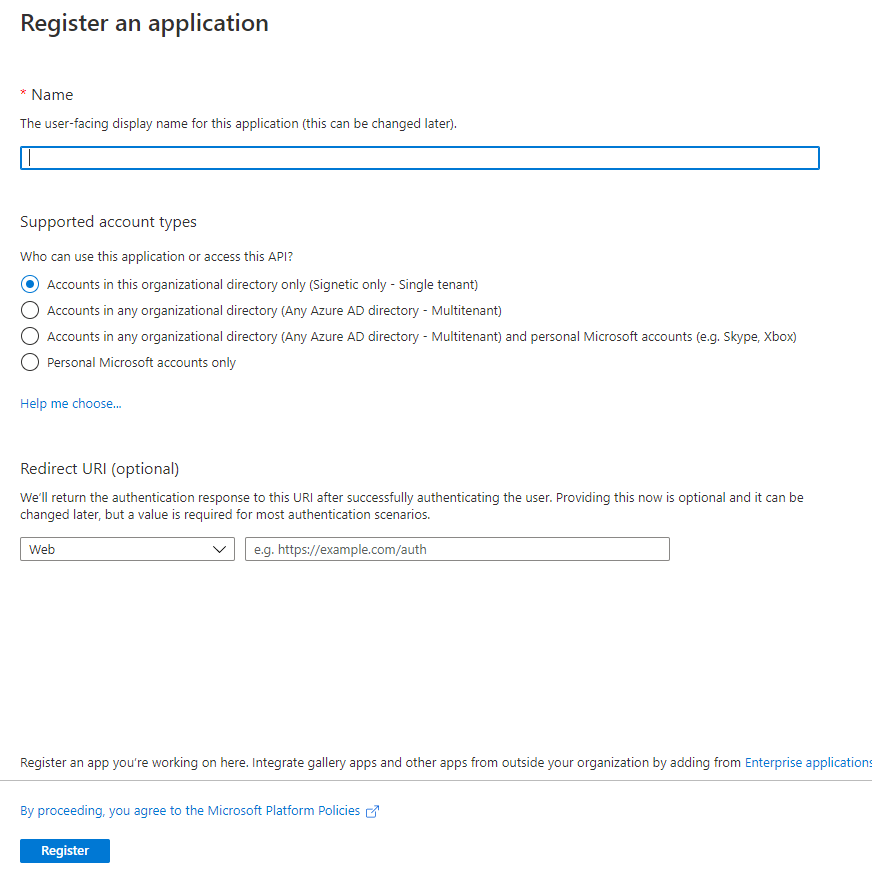
- Register an application. Give a suitable name and Select a supported account type, which determines who can use the application. Under Redirect URI, select Web for the type of application you want to create. Enter the URI where the access token is sent to.
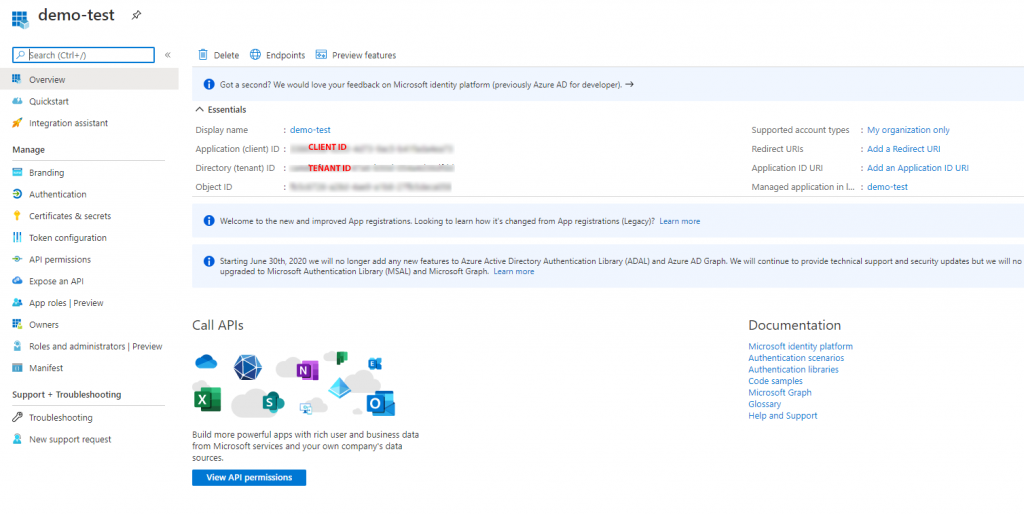
- You can get the Client ID and Tenant ID from the overview screen.
- For client secret, click + New client secret and generate a secret. Copy the secret and put it into your PowerAutomate connection and select user impersonation.

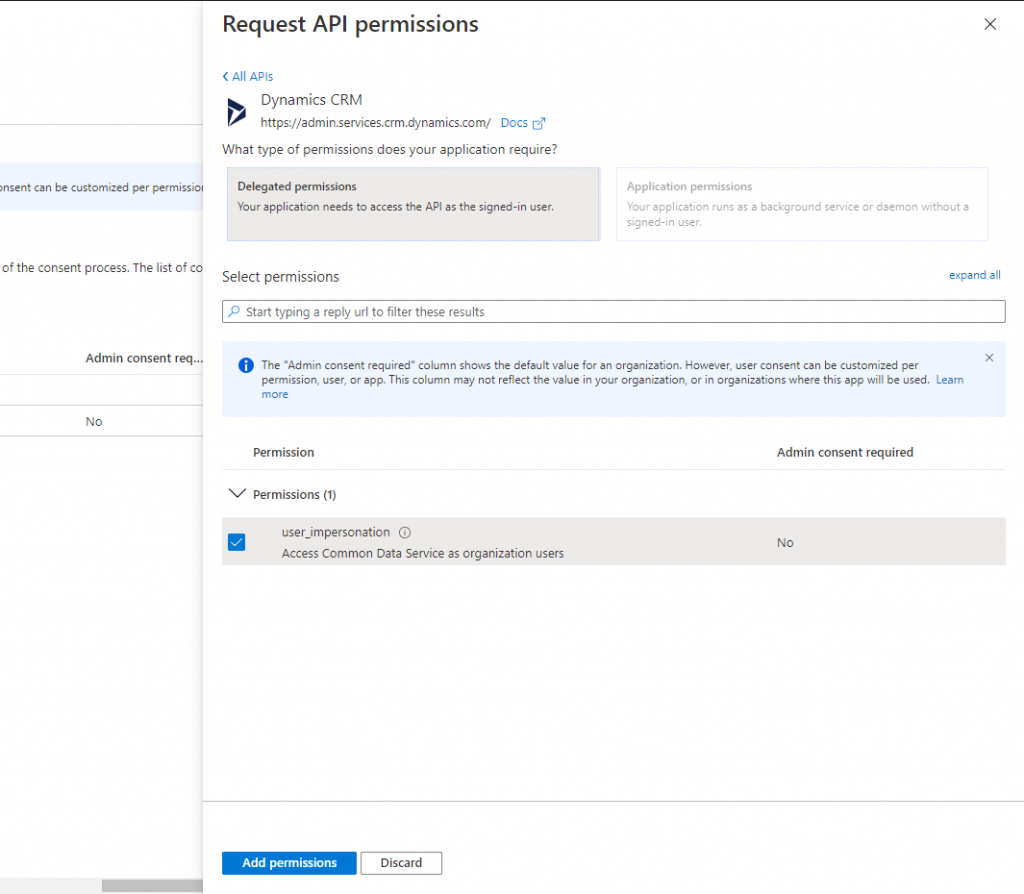
- You need to provide API permission to access Dynamics 365 Data. Go to + Add a permission, Click on Dynamics CRM.


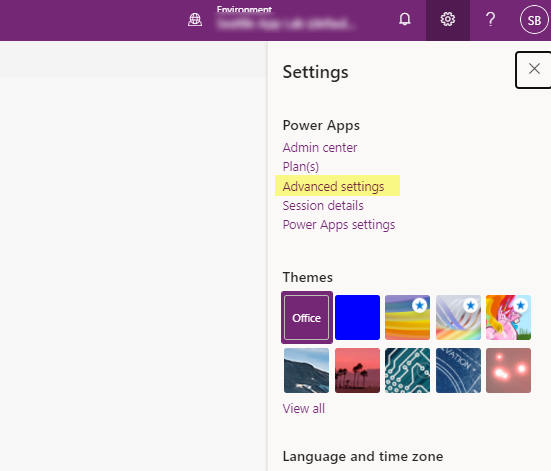
Creating a application user to impersonate.
- Go to Advanced Settings
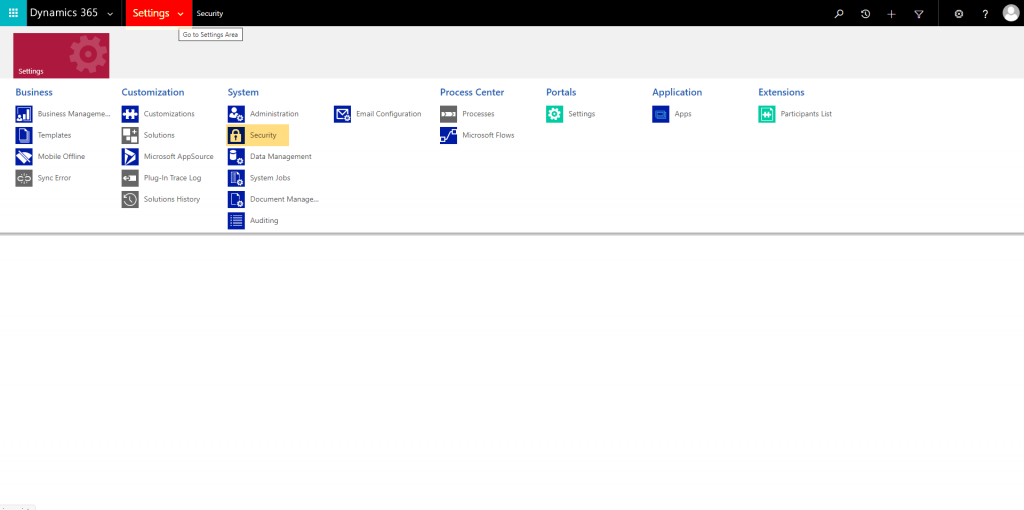
- Click on Settings > Security > Users.
- From the view selector, select Application user.
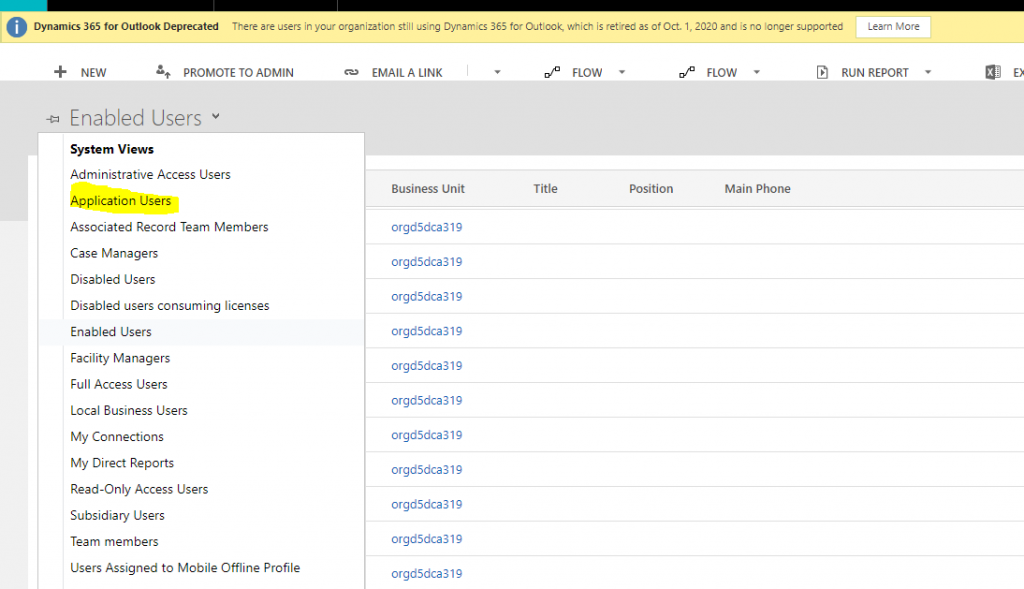
- Click + New
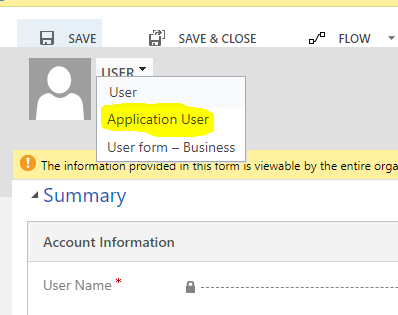
- Select Application user from the form selector.
- Paste the Application ID of the registered App on the Application ID field.
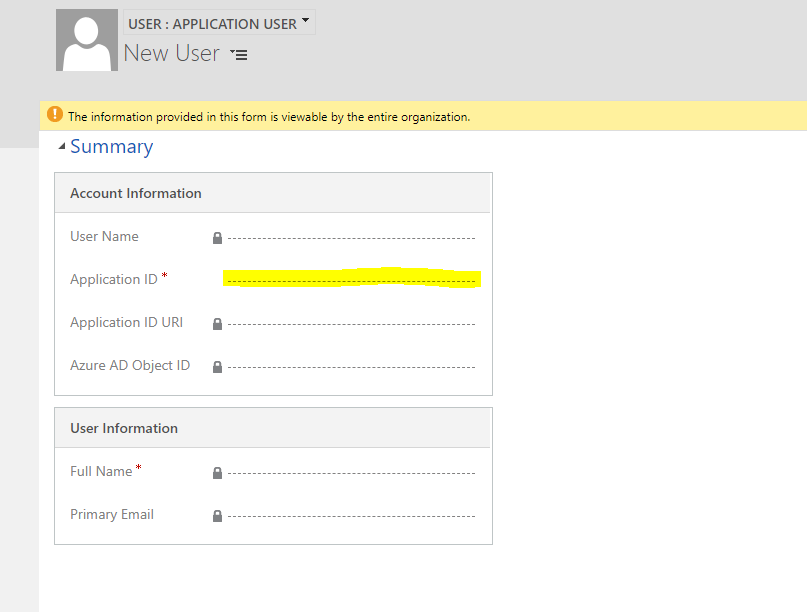
- And give the appropriate security role to this user.
- And voila you’re done.