I was 15 when I wrote my first line of PHP code. My elder brother was learning web development. He had this PHP documentation PDF on the desktop, maybe 200 pages long. One day when he wasn’t around, I opened it out of curiosity. We had XAMPP installed on our computer. My brother had explained that you needed it to run PHP, something about Apache being the web server. I got the basics but didn’t really care about the details. My process was simple: start Apache from that orange control panel, write something in Notepad, save it in the htdocs folder, refresh the browser. I copied a basic snippet from the PDF. Probably just displaying some text or a variable. Saved it as index.php and hit refresh. It showed up. Right there in my browser. The code I’d written was actually working. I had no idea what half of it meant, but seeing it work was enough to get me hooked.
And it worked.

That rush? Unmatched. I didn’t understand why it worked. I didn’t know what an array really was or how sessions actually functioned. But I could see my name pop up on a webpage I built, and that was enough.
Someone at a local tech company spotted my work and told me, ‘If you want to build something real, you need to pick up SQL’. He handed me a book and walked me through using PhpMyAdmin in XAMPP. Suddenly I was building login forms, storing data and even recreated the entire WWE website. Still had no idea what I was doing, but watching information flow from a form into a database felt like wizardry.
But here’s what nobody tells you when you’re 15 and riding that dopamine wave: programming as a career is nothing like that.
When the Magic Wears Off
Fast forward a few years. I’m a developer now. Real projects, real deadlines, real expectations. And suddenly, coding isn’t fun anymore. It’s exhausting.
Traditional development demands something my brain just doesn’t do well: sustained, linear focus. You’re supposed to sit down, map out architecture, write clean code for hours, debug methodically, document everything. It’s slow. It’s meticulous. And if you have ADD? It’s torture.

I’d start a feature on Monday, get distracted by Tuesday, forget what I was doing by Wednesday, and spend Thursday relearning my own code. I’d lose hours in Stack Overflow rabbit holes, start refactoring something that didn’t need it, or get so bored waiting for builds that I’d switch to a completely different task.
The worst part? I thought it was me. That I just wasn’t disciplined enough. Wasn’t “serious” enough about my craft.
Then I discovered low-code platforms. And honestly? Everything changed.
Why Low-Code Feels Like Programming at 15 Again
Remember that PHP rush I mentioned? That instant “holy crap, it works!” feeling? Low-code brought that back.
Power Platform, specifically, feels like someone designed it for brains like mine. Not despite the ADD, because of it.
Here’s why it clicks:
1. You See Results Immediately
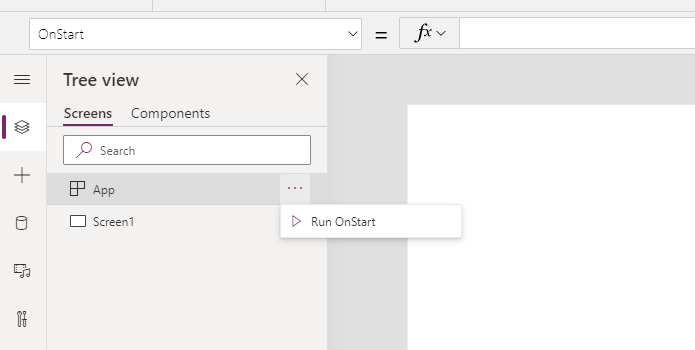
No waiting for compilers. No wrestling with dependencies for three hours before you can even run “Hello World.” You drag a button onto a canvas, press play, and boom. It works.

That quick feedback loop is everything. My brain needs those small wins to stay engaged:
- “Oh, that gallery is pulling my data correctly”
- “Wait, I just automated an email notification in 5 minutes?”
- “This actually looks… professional?”
Each little success fuels the next action. It’s momentum based learning, and it’s perfect for minds that need constant stimulation.
2. You Can Build in Sprints, Not Marathons
Traditional coding expects you to hold complex logic in your head for hours. Low-code breaks everything into bite sized pieces.
I work in 15 to 20 minute bursts now:
- Add a form
- Connect it to SharePoint
- Test it
- Take a break
- Come back and add a notification
- Test again
- Break

Sometimes I hit hyperfocus and build for two hours straight, and that’s great when it happens. But I don’t need it to make progress anymore. I can show up for 20 minutes and still ship something real.
3. It Handles the Stuff Your Brain Drops
My memory is like a browser with 47 tabs open. Something important is definitely lost in there, but good luck finding it.
Power Automate became my external brain:
- Automatic reminders for follow ups
- Notifications when approvals sit too long
- Daily digests of what needs attention
- Forms that route themselves to the right people

I’m not trying to “remember better” anymore. I’m building systems that remember for me. And that shift? That’s where real productivity started.
The AI Layer Makes It Even Better
Now we’re adding AI into the mix with Copilot and AI Builder, and honestly, it feels like cheating in the best way.
Need to extract data from receipts? AI Builder does it.
Want to generate app descriptions? Copilot writes them.
Stuck on a formula? Ask, and it explains in plain English.

For someone who never formally learned “the depth” of programming (just PDF files and trial and error), AI fills those gaps. I can build sophisticated solutions without needing to be sophisticated myself. The tools are smart enough that my half formed ideas actually work.
This Is Where ADD Brains Thrive
Here’s what I wish someone told me earlier: Your distracted, wandering brain isn’t a bug. It’s perfect for this kind of building.
Low-code rewards:
✅ Curiosity over focus
✅ Experimentation over planning
✅ Quick iterations over perfect architecture
✅ Learning by doing over studying theory
You don’t need a CS degree. You don’t need to understand recursion. You just need to be willing to click around, try stuff, break things, and fix them.

Start Messy, Ship Anyway
I spent years thinking I needed to “get better” at traditional development. Truth is, I just needed different tools.
If you’re someone who:
- Learned to code young and loved it, but struggles with it professionally
- Gets bored easily when progress feels slow
- Forgets things constantly despite your best efforts
- Works better in bursts than marathons
- Wants to build things but feels overwhelmed by “proper” programming
…then low-code might be your thing. Not as a compromise, but as a superpower.
The Microsoft Power Platform community is full of people like us, building real solutions without the burnout. There are short videos, step by step guides, and forums where people genuinely want to help.

You don’t need the perfect system to start. You just need something you can keep coming back to, 20 minutes at a time.
Start small. Build something that makes your life easier. Let the platform handle the heavy lifting while you focus on the creative parts, the parts that got you excited about technology in the first place.
Because that 15 year old with no internet, just a PDF file and curiosity, who thought coding was magic? They were right. It just took me years to find the kind of magic that actually works with my brain, not against it.
Ready to explore? Check out the Microsoft Power Platform and start building at your own pace. No pressure. No deadlines. Just you and your ideas.

“`